%20Text%20(Violet).png)
*The following information was written in relation to my teaching of levers for AQA GCSE PE 9-1 but can be considered relevant for all KS4 and KS5 PE courses where levers is a topic.
Prior to 2016, very few PE teachers were teaching levers. Only those who taught the OCR A-level optional biomechanics unit would have developed a good understanding of how to cause learning in this topic. Since then, levers have been taught thousands of times all over the country and, according to the information I have access to, is one of the most feared topics in our domain.
With this in mind, I thought I’d share my thoughts about levers because I happened to rerecord my AQA lessons on the topic today.
Haven't got time to read it now?
Bookmark this page (CTRL+D) or download the PDF version of this blog.
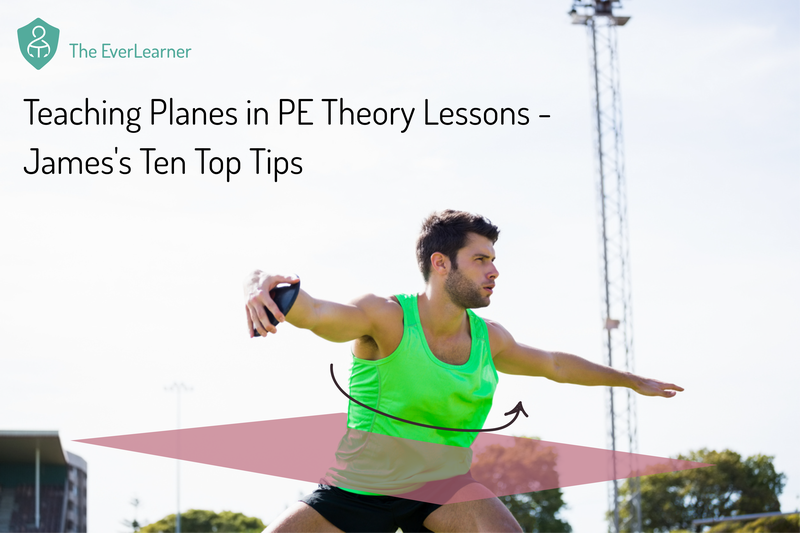
You’ll notice in the video that I start the lesson from two perspectives:
1) All human (skeletal) movement is circular/angular. This is really important as, without this, the student cannot understand the “why” of levers. It is also important because it informs other studies, including future studies on mechanical concepts.
2) I start the lesson with an example incorporated. This is to ensure that the application (typically AO2) is never secondary to or distinct from the main concept.
You’ll also notice a strong use of imagery. High-quality imagery lends itself beautifully to this topic and will form a fundamental part of the learning experience. Because imagery is so crucial, I urge you to make your students draw levers extensively. They do not need to draw performers, although many of your students will be able to do so if you wish. Your lessons should involve pencils, rulers and stencils (for the square, triangle and arrows as required) and the more that you can insist on perfection, the more impactful your teaching will be. I must confess that my science background comes out in this aspect. I am all for sharpened pencils, straight lines and beautiful labelling. My students find it overbearing sometimes but they make GREAT diagrams! I believe this deepens the learning experience and makes the acquisition of this new learning more meaningful.
Another feature of my teaching is that I do not avoid talking about specific insertion points for muscles. If we take elbow movement as the example, the only way the student can understand that elbow flexion is a third class lever system and that elbow extension is a first class lever system is knowing where the biceps and the triceps insert respectively. Without learning this, we reduce the learners’ opportunity to merely being able to memorise the examples and prevent them understanding them.
A further tip I recommend is the use of the following phrase:
“Convince me that elbow extension is a third-class lever system" or “Convince me that neck extension can never be a third-class lever system”.
This forces the student to not only remember the example but to justify the classification. The only way to do this is to understand all four components of the lever. This is exactly what we are aiming for. We are using this command for levers but it can be used for anything. I tend to see a lot of teacher questioning techniques starting with phrases such as “Which…”, “Give me an example of…”, “How many…”, “Give me two keyword descriptions of…” None of these are poor question structures but they ask far less of a student compared to my examples.
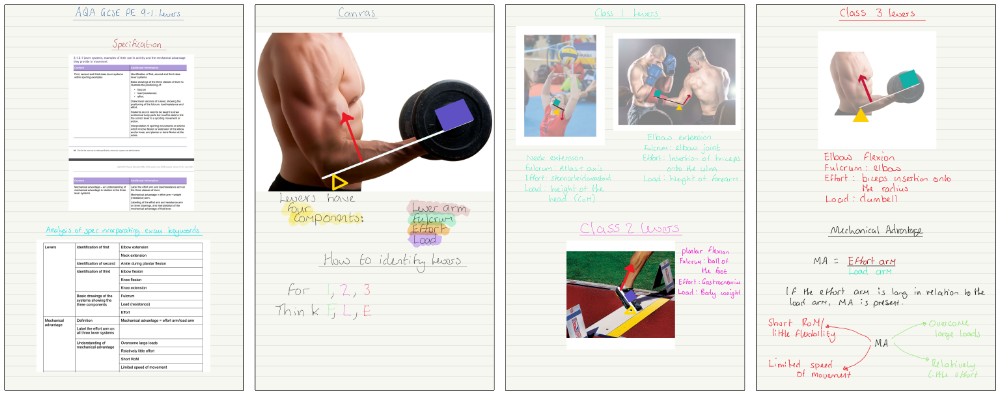
Imagery is clearly important in this lesson. I highly recommend that lever images and performance images are overlaid. Here are some examples:
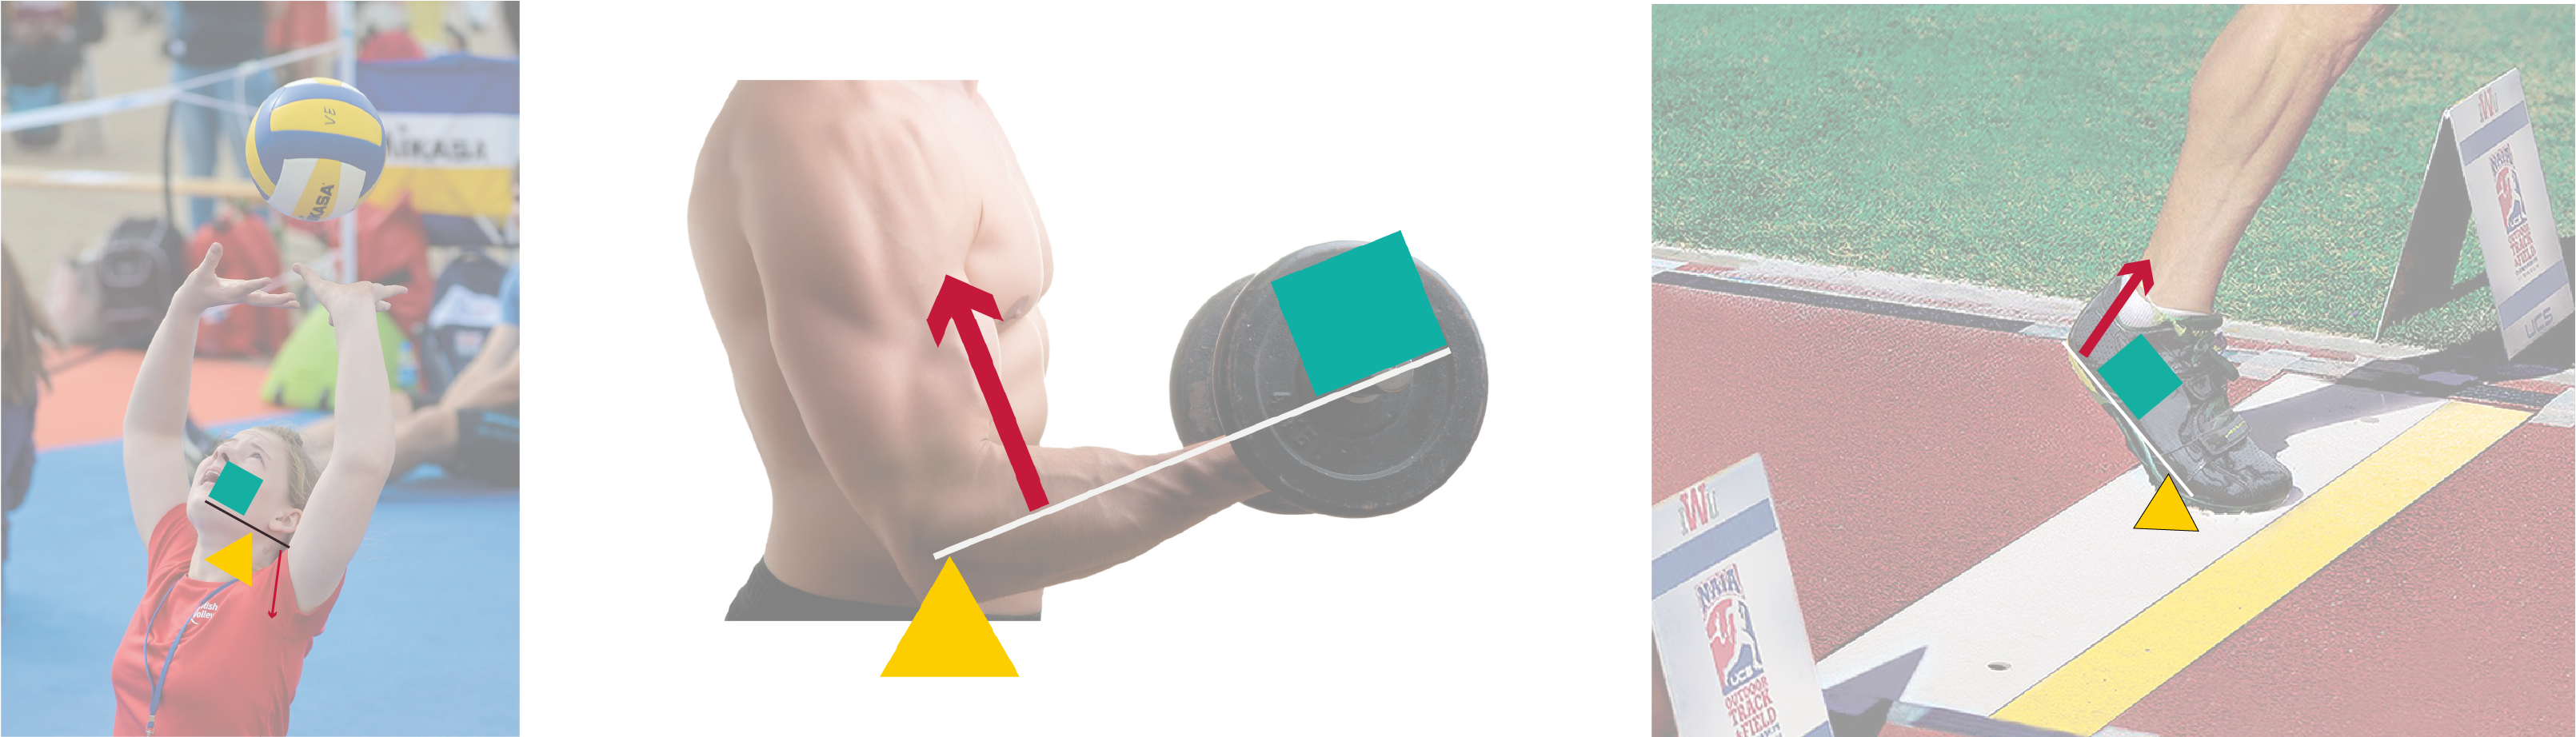
Most basic image editors will allow you to overlay in this way but I make the following three recommendations to get the images just right:
1. Use transparency settings for the background/performance image to bring the lever to attention.
2. Ensure that your effort is from the exact location of the insertion of the muscle.
3. Use performance images NOT skeleton-like images.
With all of these points in mind, I have decided to share my video lesson notes with you. Please remember that these are not a lesson plan: they are a delivery plan and are written purely for the advocation section of my teaching. I hope that you will see many of the themes I mentioned above.
Click the image to download my lesson notes
A word about classifications:
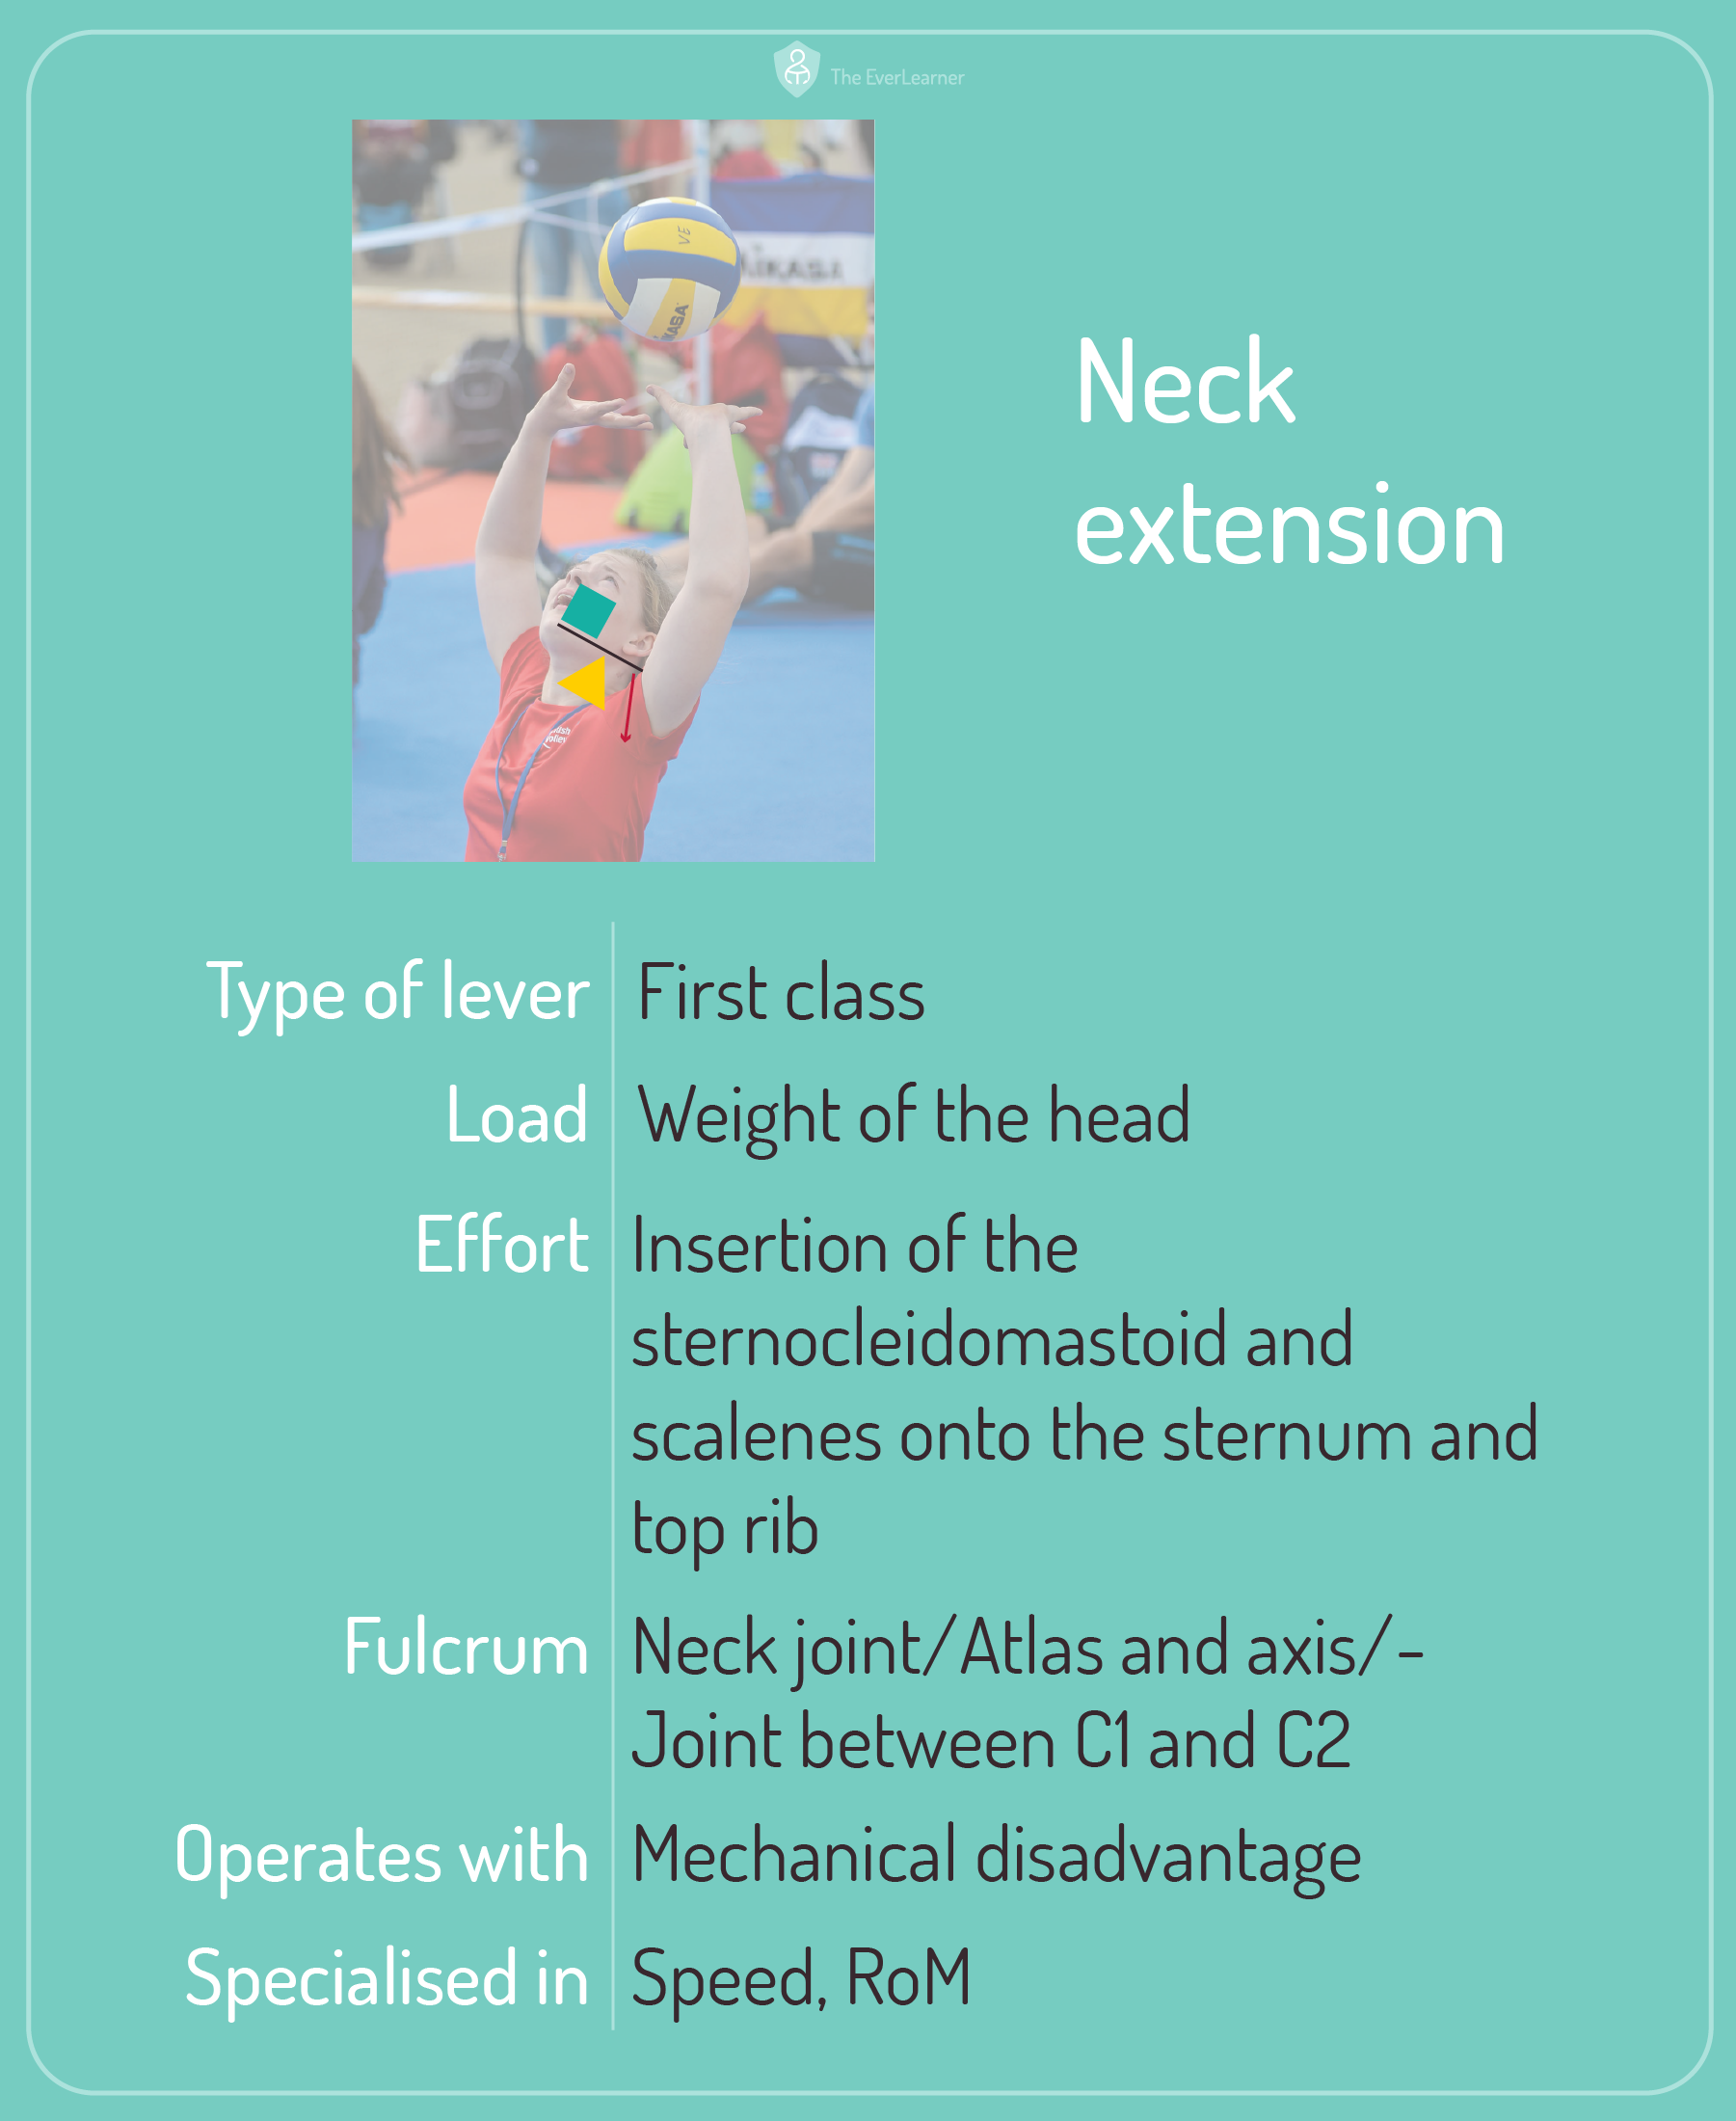
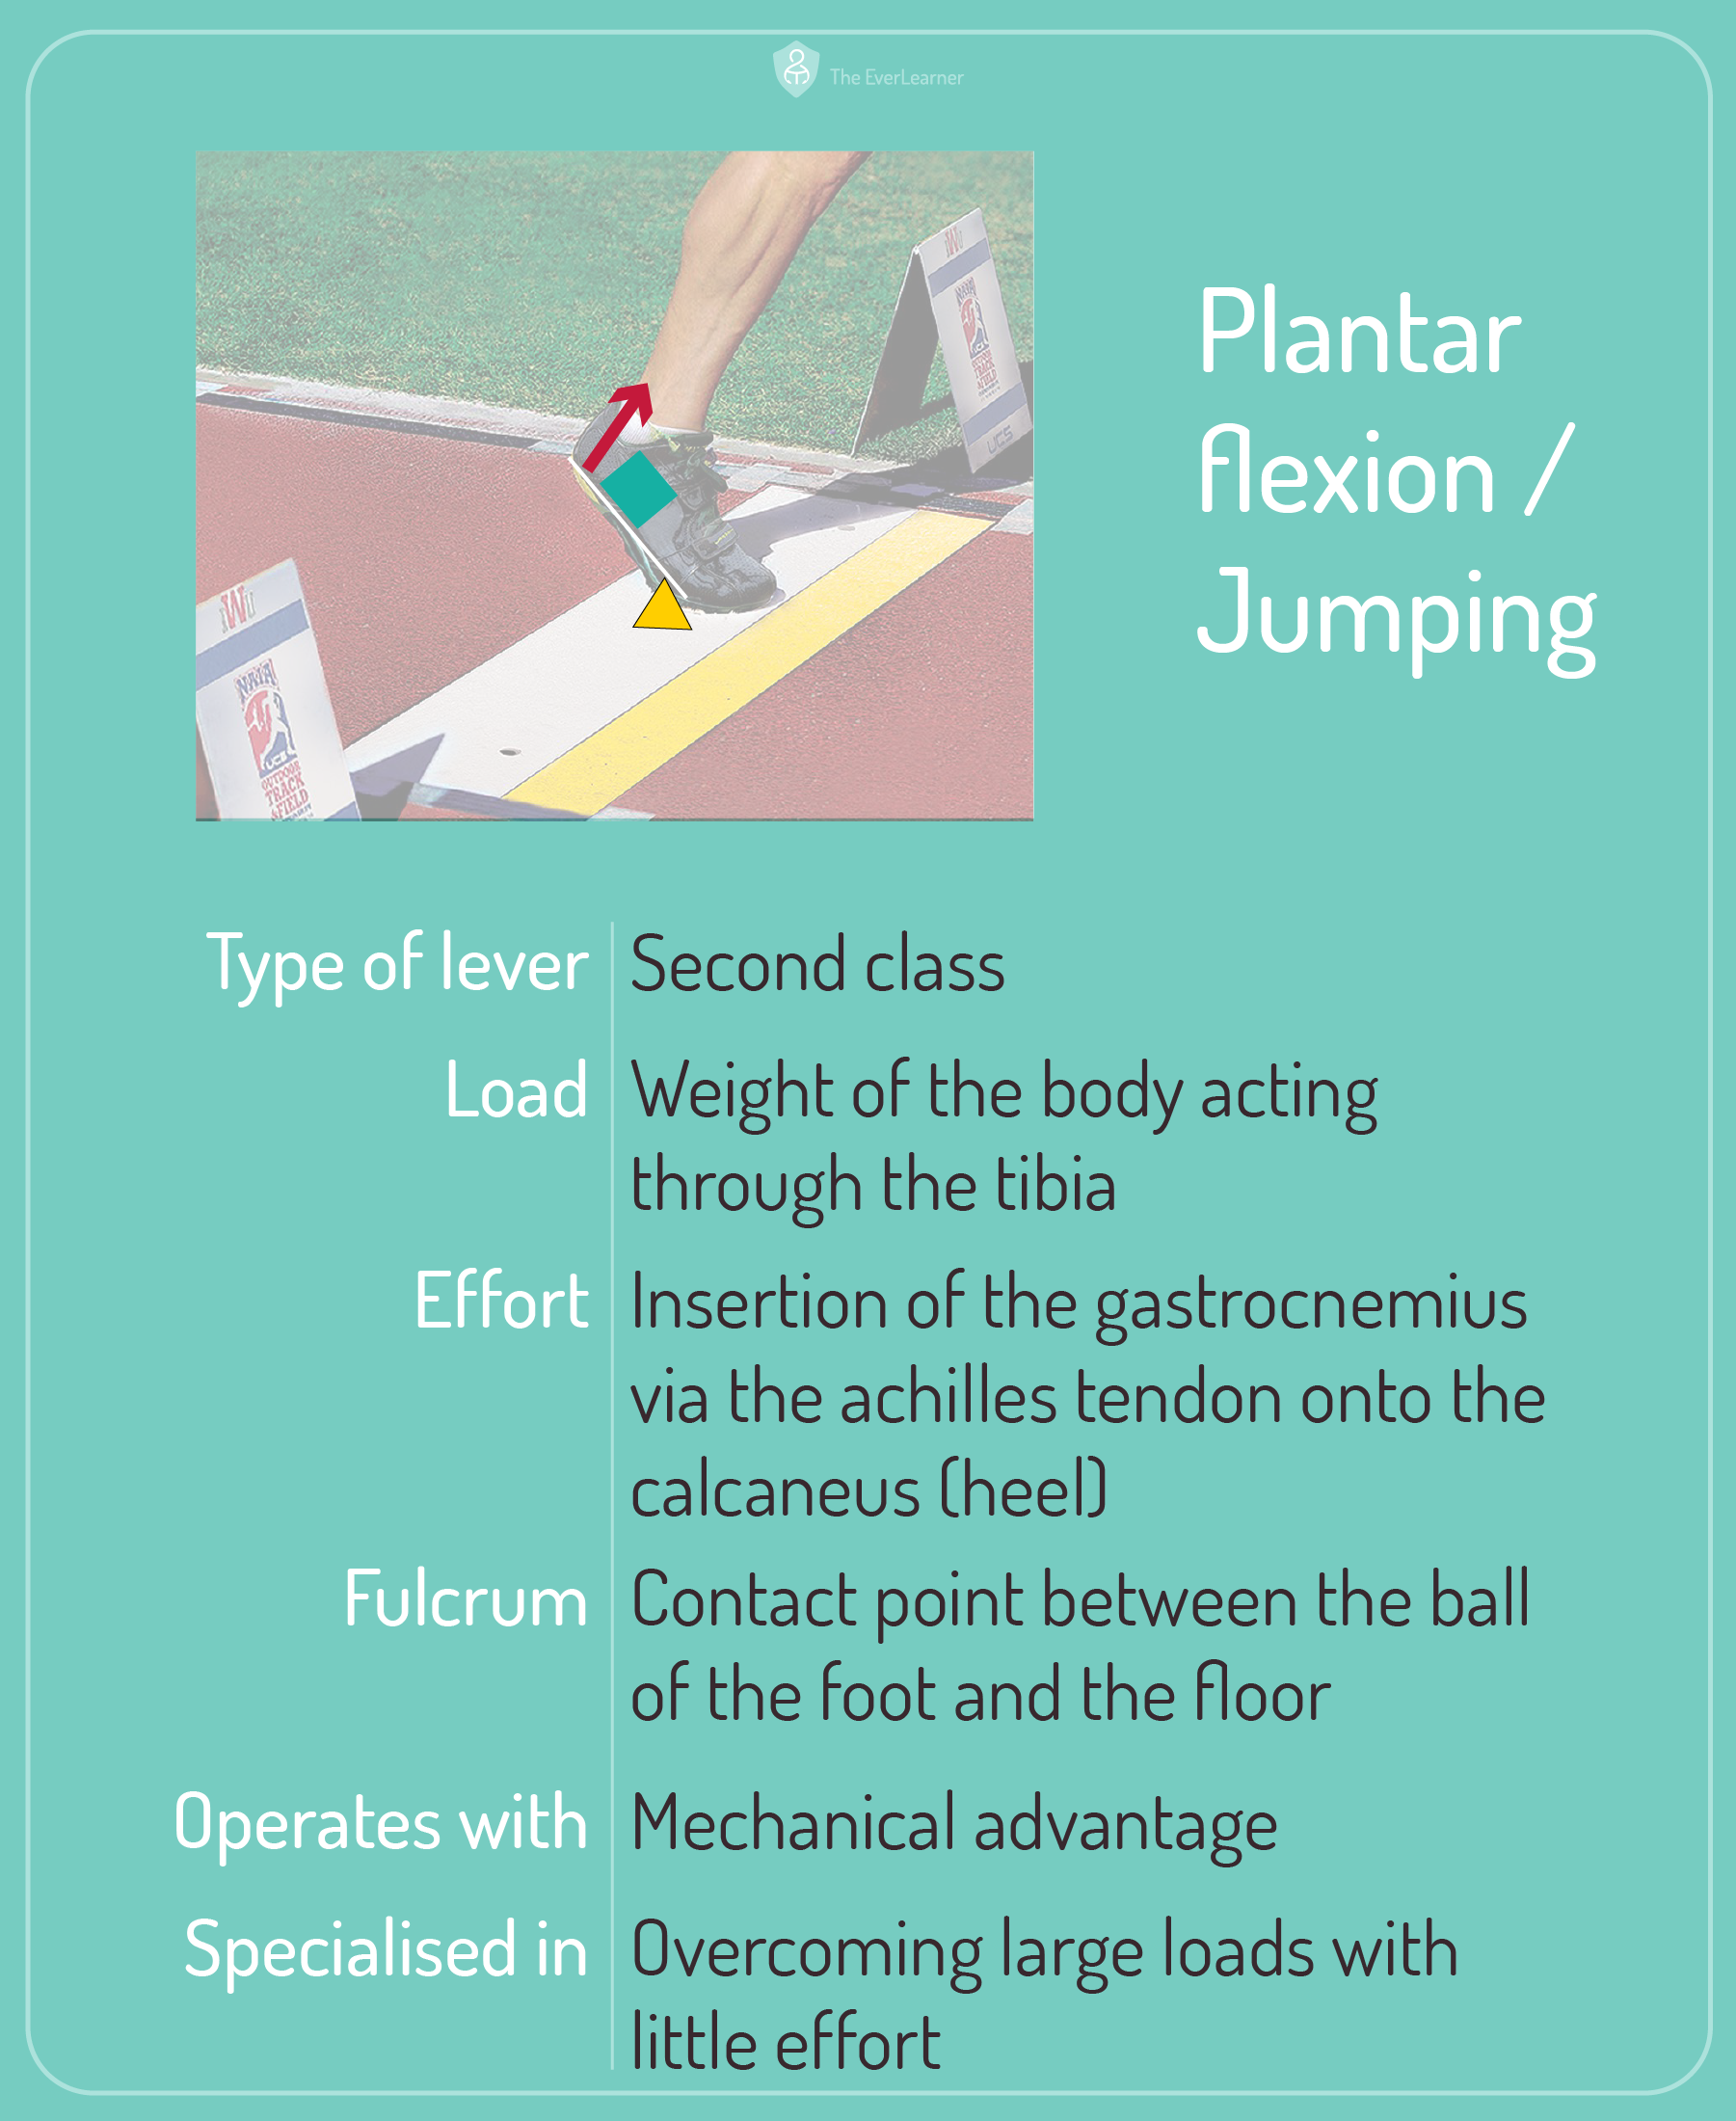
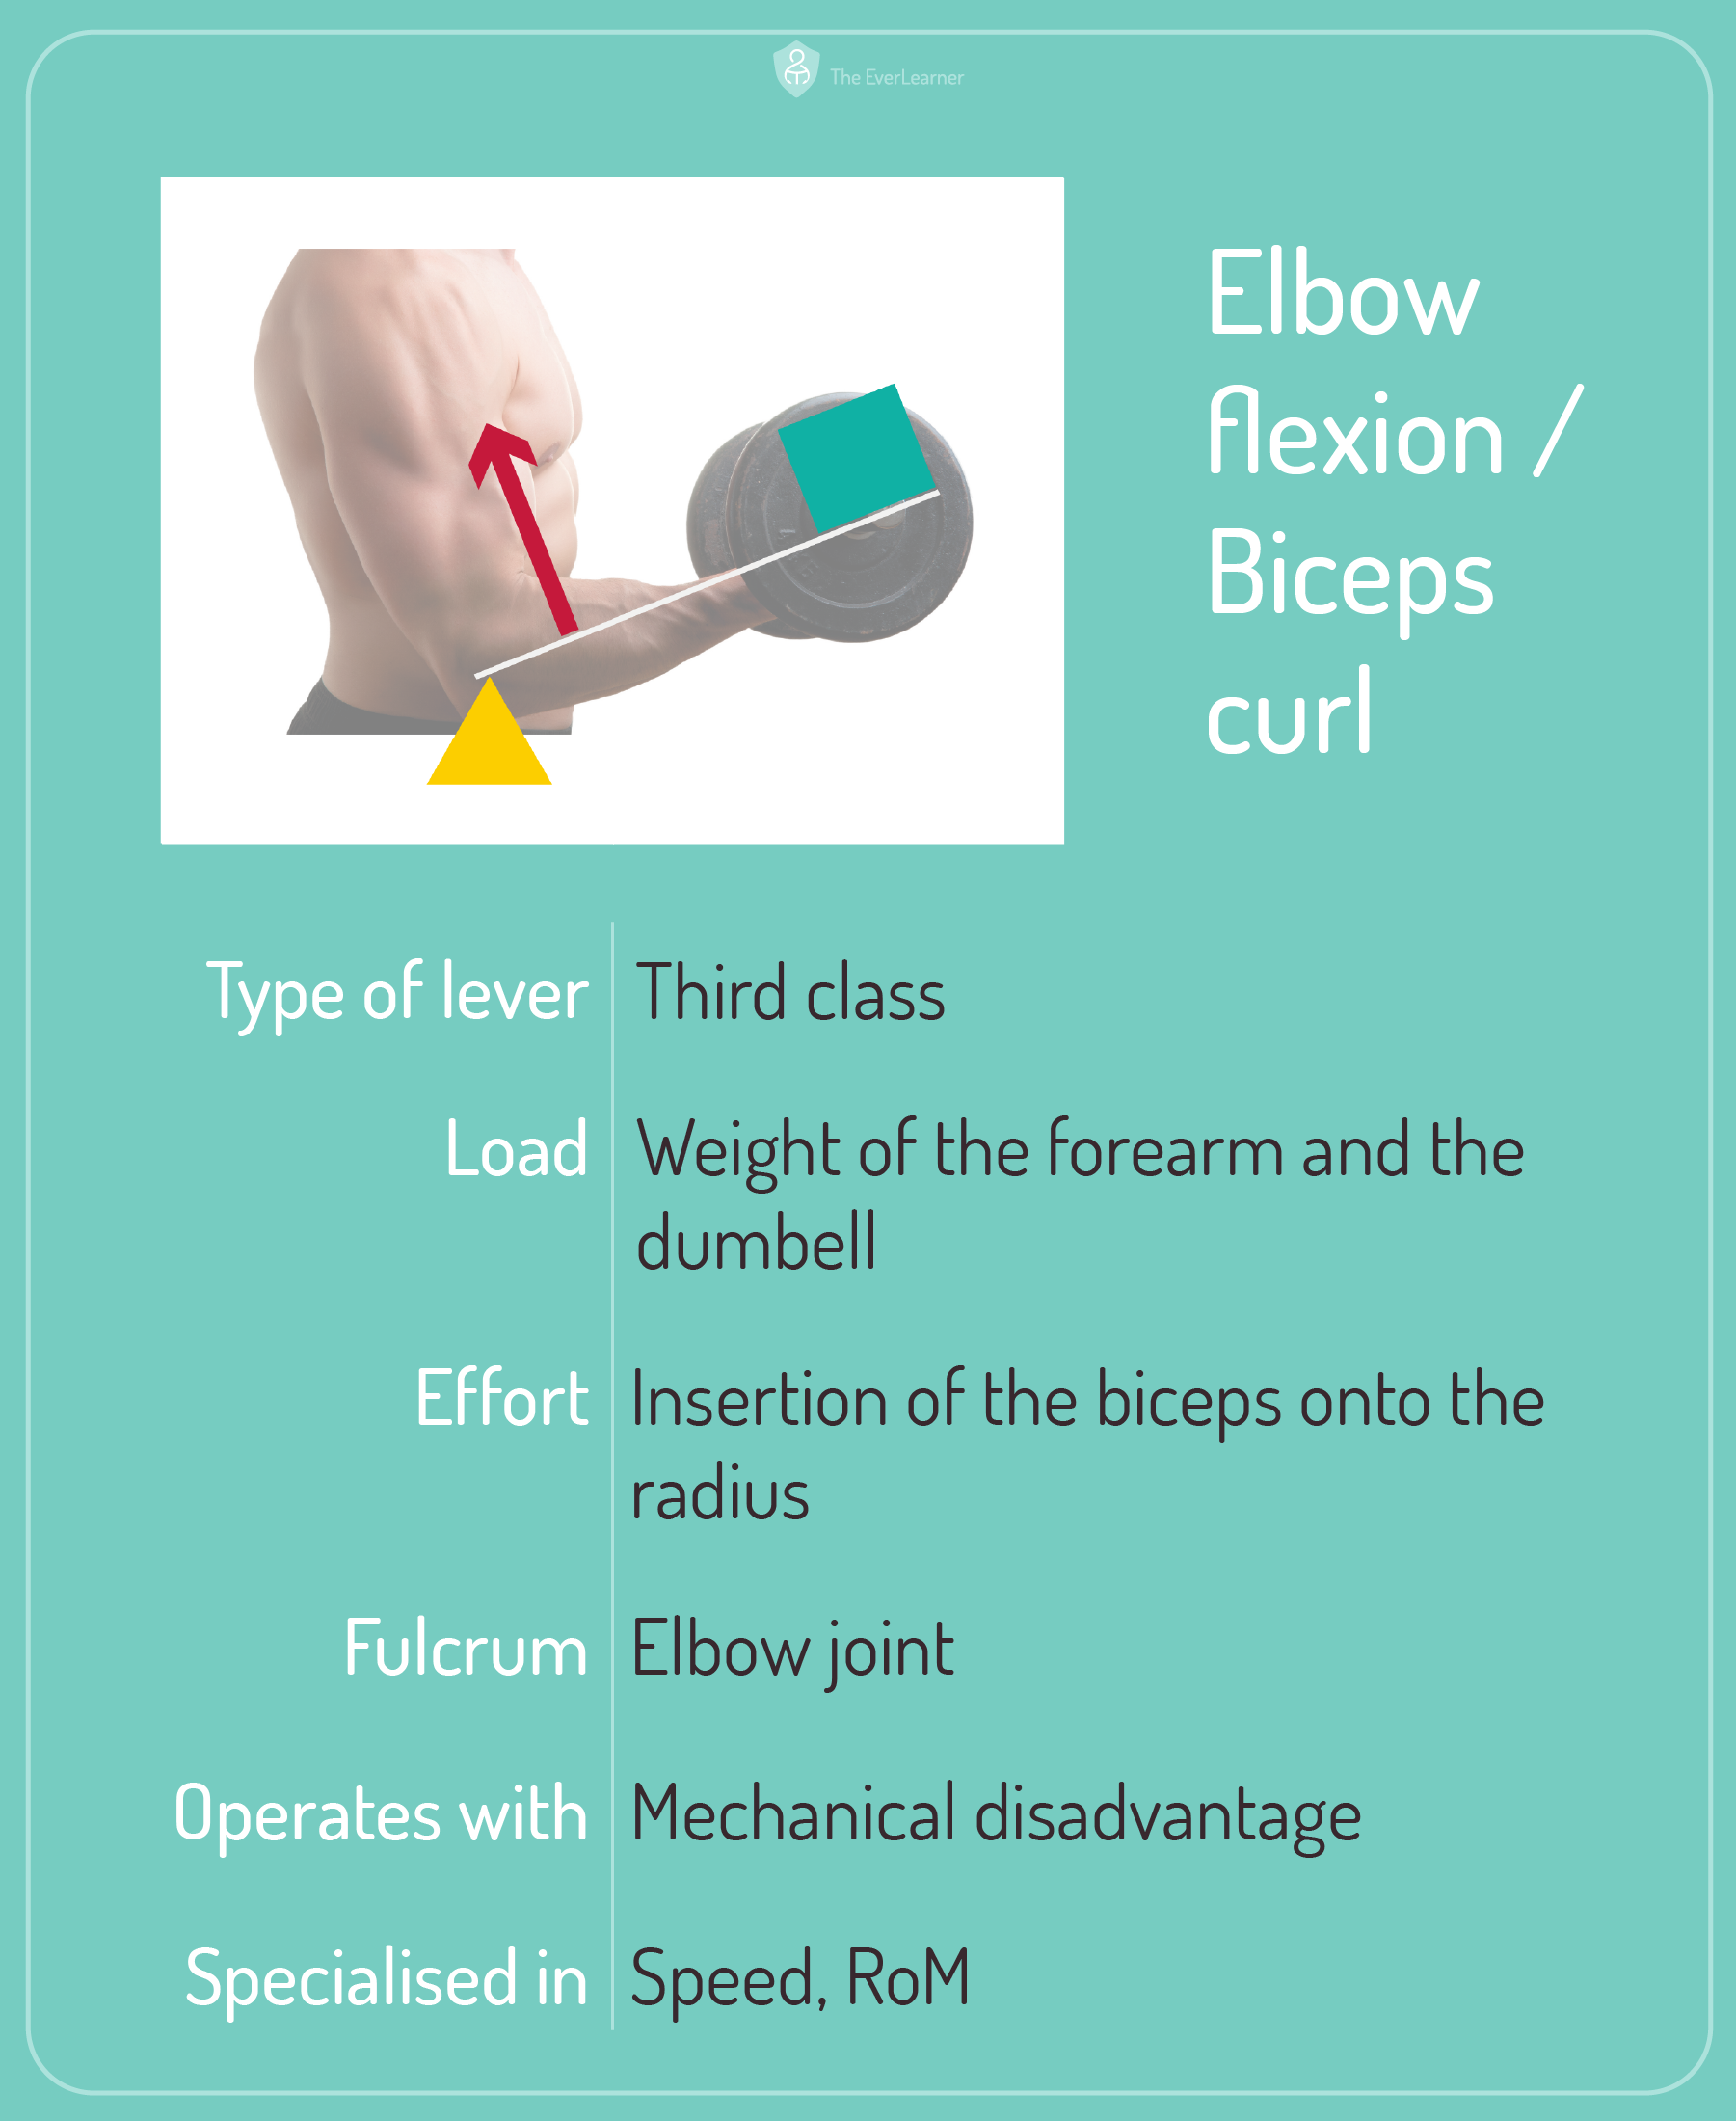
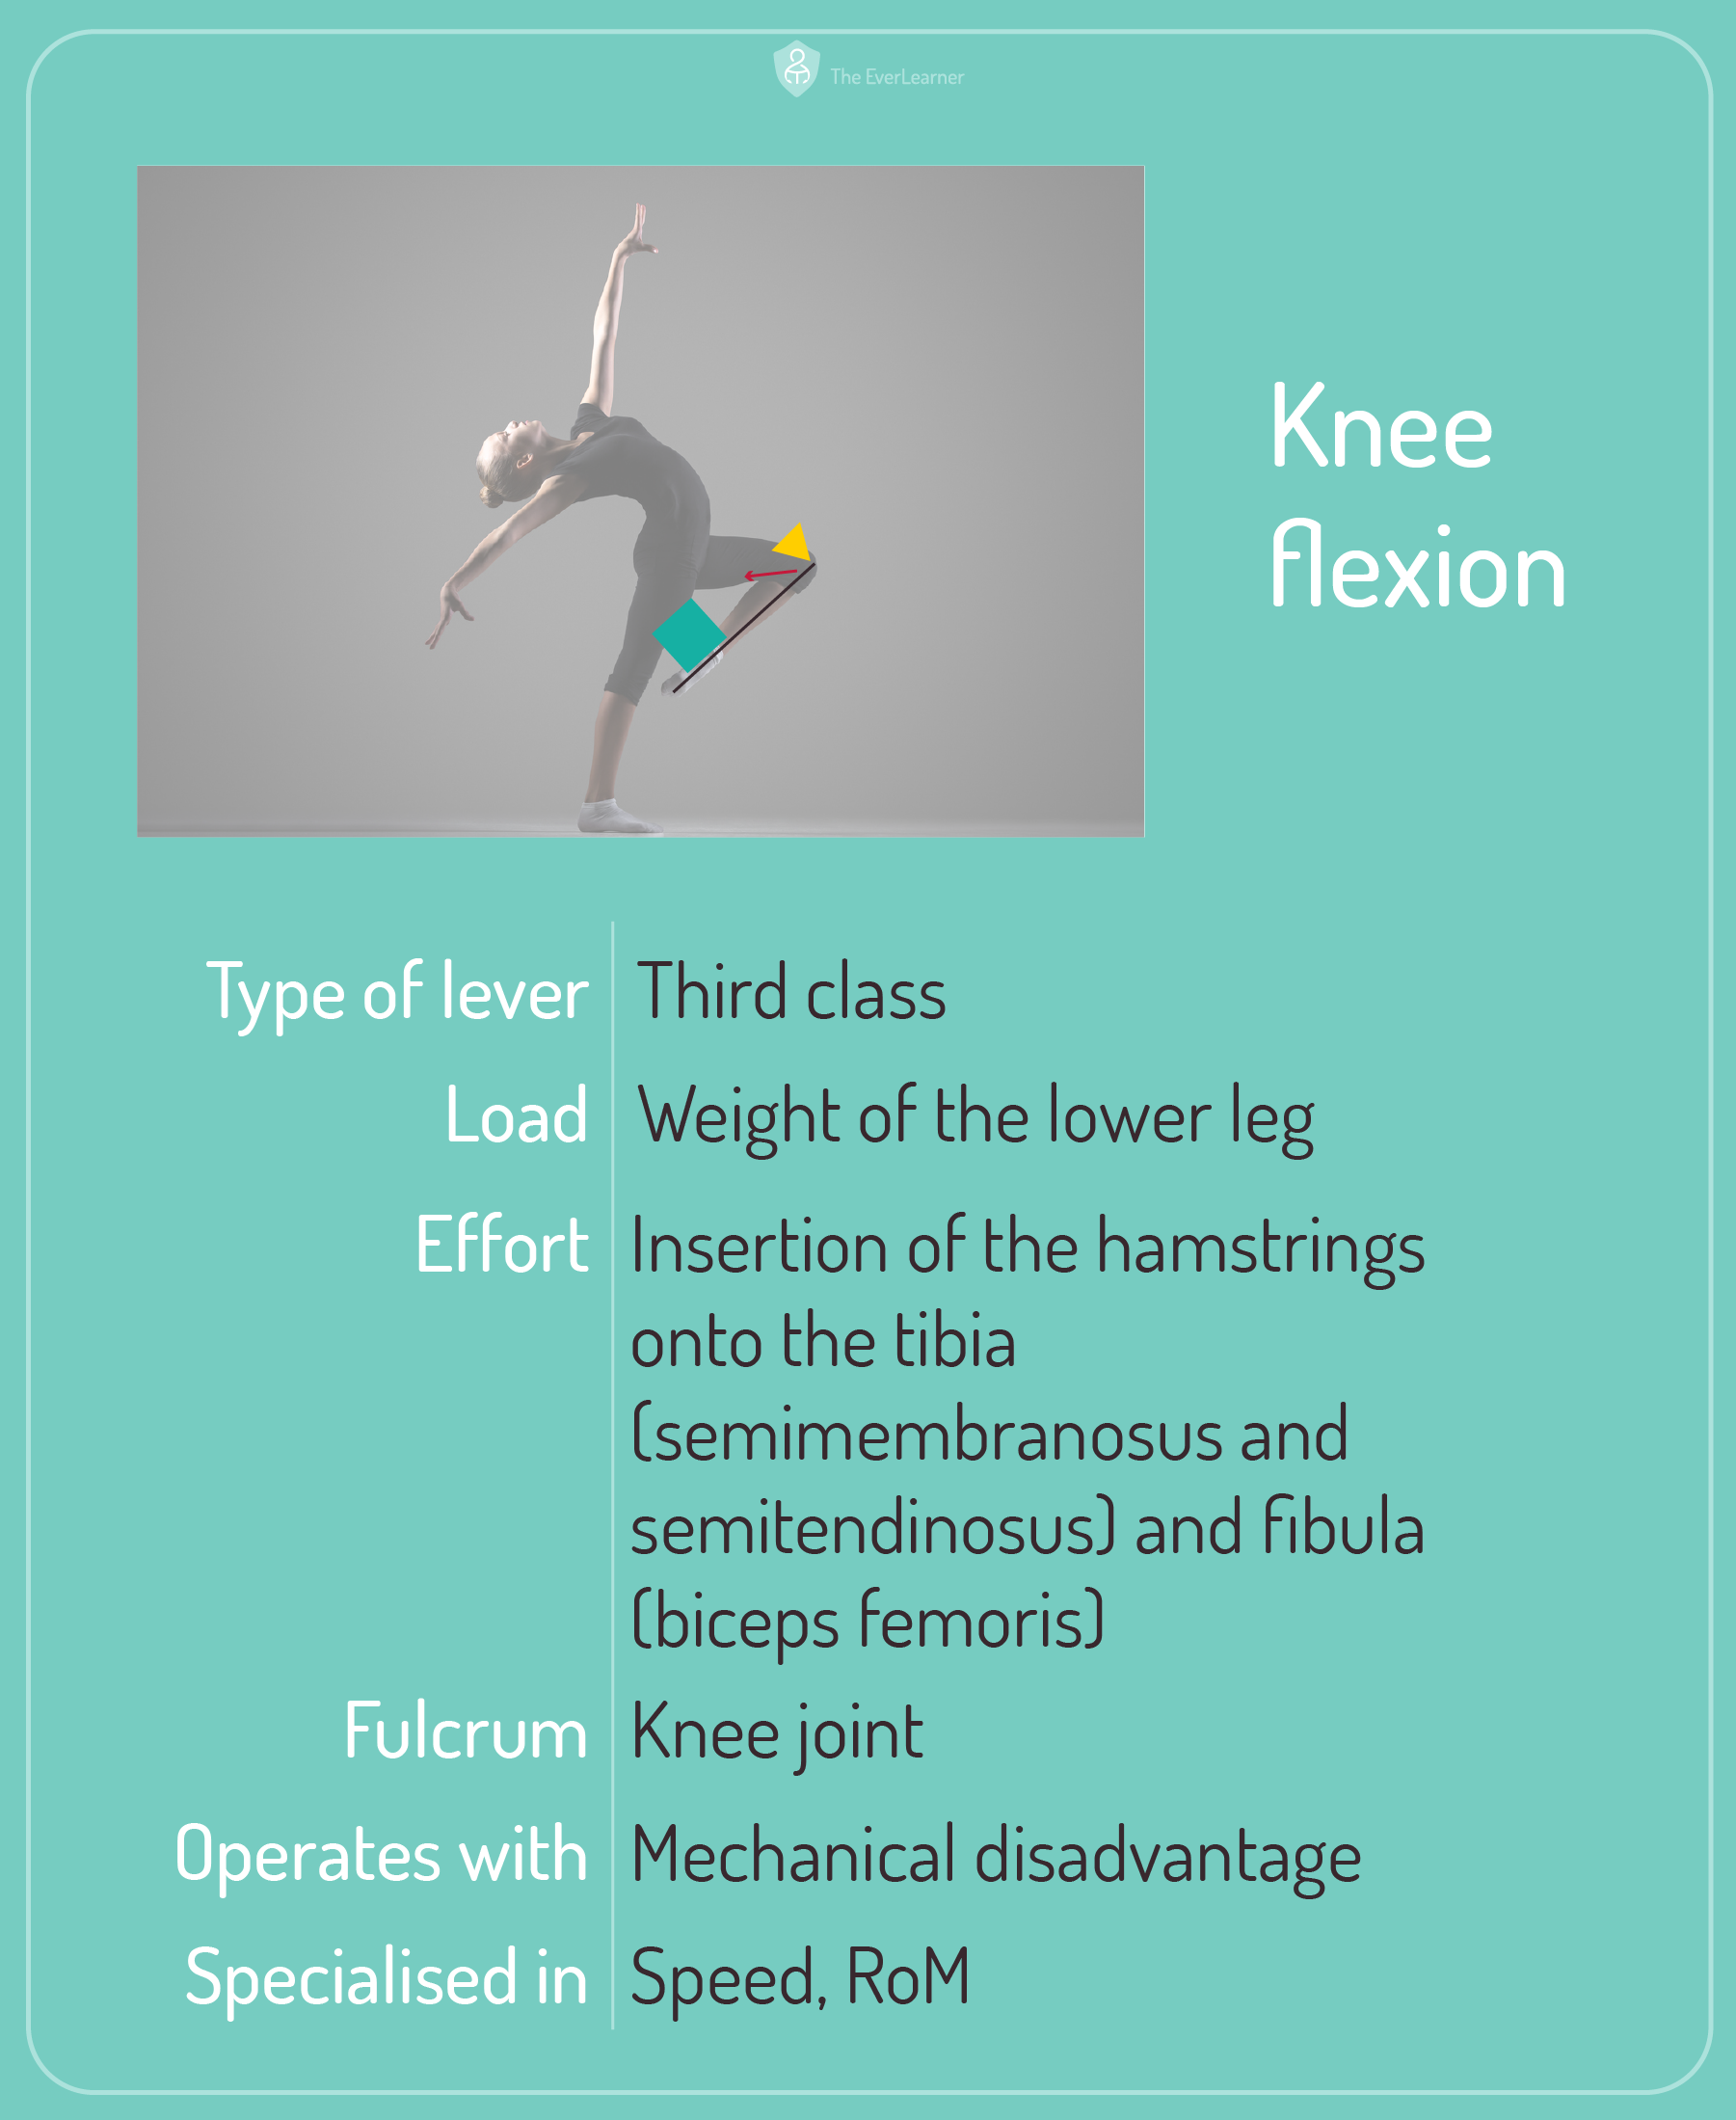
I’ve noticed quite a lot of confusion about which movement relates to which lever. At times, exam boards don’t help with this as they themselves seem a bit confused. Therefore, I thought it would be handy to make these mini-cards that you can use whenever you need them:
Click each image to download the mini-card

These cards can be used for two purposes:
- As a teacher’s reference resource. A grab-and-go batch of information that supports you to teach accurately in the classroom.
- As a resource for developing students’ explanatory and justification skills.
Please share this post. Please comment in the blog and ask any questions that you have.